

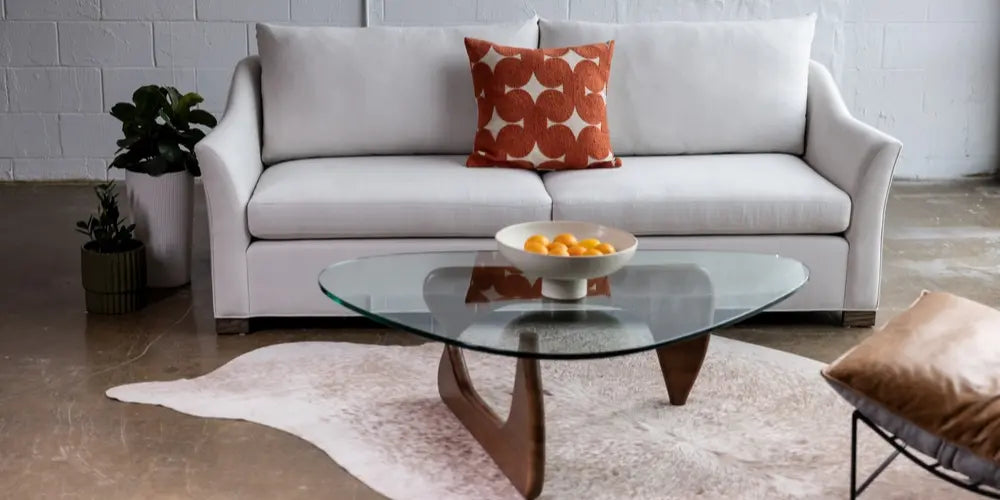
When the art of design meets the nobility of wood and the transparency of glass, the result is a one-of-a-kind piece of furniture: the wooden table with a glass insert. This harmonious combination of natural materials offers not only a contemporary look but also unrivalled function for your interior. But how do you build such a marvel? That is what we find out in this article.
Building a wooden table with a glass insert is not simple DIY. It is a project that calls for precision, attention to detail and a certain know-how. It means choosing the right materials, building a solid structure, fitting the glass insert correctly and adding finishes to embellish your creation. Finally, you need to know how to look after this table to ensure its longevity.
In this article, we guide you through every step of the process to help you make your own wooden table with a glass insert. Get ready to dive into the fascinating world of premium DIY!
1. Choosing the materials and preparing

Type of wood
First of all, you need to choose the type of wood you want to use for your table. Species such as oak, walnut or spruce are particularly popular for their durability and looks. You can find these types of wood in most DIY shops or online, from specialist suppliers such as Verano Design.
Choosing the glass
The choice of the glass to insert is just as important. Opt for toughened glass, which is stronger and safer than ordinary glass. You must also take the correct measurements to make sure the glass insert will fit your table perfectly.
Tools you need
To carry out this project, you will need several tools: a circular saw to cut the wood, a sander to smooth the surface, a drill to join the pieces, and pliers to handle the glass. Do not forget safety equipment such as protective goggles and gloves.
Now that you have chosen your materials and prepared your tools, it is time to move on to the next step: building the structure of the table. Are you ready to take up the challenge? Stay with us to find out how to bring your wooden table with a glass insert to life.
Discover more inspiring ideas and premium options in our Verano Design online shop. Also subscribe to our newsletter to receive regular practical tips on interior and exterior design and decoration.
2. Building the structure of the table
Building a wooden table with a glass insert is an ambitious undertaking, but the excitement of seeing your vision come to life is unmatched. Once you have chosen your materials and prepared your tools, it is time to start building.Cutting the wood
Begin by cutting the wooden boards to the dimensions you defined in the preparation phase. Use a circular saw to get clean, precise cuts. Make sure each piece matches your measurements exactly, because a small gap can have a big effect on the final assembly.Assembling the pieces
Once the cutting is done, move on to assembling the pieces. For this, use strong screws that can support the weight of the glass top. Take care to align each board correctly before fixing it, to guarantee a solid, balanced structure.Sanding the wood
Sanding is an essential step to ensure a smooth, professional finish. Use medium-grit sandpaper to remove roughness and soften sharp edges, then move on to a finer grit to get a perfectly smooth surface. Sanding also makes the wood more receptive to varnish or paint, improving the final look. Before moving on to the next step, take a moment to admire your work. You have built the structure of your table, an achievement in itself. But there is still work to do to turn this raw structure into a refined piece of furniture.
3. Fitting the glass insert

Fitting the glass insert is delicate but rewarding. By following these steps carefully, you can avoid common mistakes and achieve a spectacular result.
Creating a space for the glass insert
The first step is to create a space in the top of the table to hold the glass insert. Use a jigsaw to cut a hole to the exact dimensions of your insert. Make sure the edges are perfectly straight and smooth, because any irregularity will be visible under the glass.Fitting the glass
Once you have created a suitable space, it is time to fit the glass. Place it gently in the hole, taking care not to chip or scratch the surface. To hold the glass, use fixing clips designed specially for this task, which will hold the glass in place without spoiling its look. When you have finished this step, step back and admire your work: you are now the owner of a beautiful wooden table with a glass insert! But do not put your tools away just yet, as there are still a few finishing touches to perfect your creation. Remember, beauty lies in the details. In the next section, we cover the finishes and embellishment of your table to turn a simple structure into a functional work of art.4. Finishes and embellishment
Having carefully built the structure of your table and fitted the glass insert, it is time to add the finishing touches that will turn this DIY project into a true masterpiece. So how do you give your wooden table with a glass insert a premium look? Here are a few tips to guide you.Varnishing or painting the wood
The first step is to choose the type of finish you want for the wood. If you want to show off the natural beauty of the wood grain, a clear varnish would be ideal. Not only does it enhance the look of the wood, it also offers protection against scratches and stains. For those who prefer a touch of colour, opt for a weather-resistant paint if the table is intended for outdoor use. Just make sure the paint is applied well and leave it to dry completely before using the table.Adding other decorative touches
To add an extra dimension to your table, consider decorative touches such as adding mouldings or using a stencil to create a distinctive pattern on the tabletop. Another option could be to build in lights under the glass insert to create a spectacular effect in the dark. Do not hesitate to be creative and add your personal touch so that your table is truly one of a kind.5. Care and upkeep
Now that you have created your beautiful wooden table with a glass insert, it is important to know how to look after it properly to ensure its longevity.Cleaning techniques
For the glass top, use a window cleaner and a soft cloth to avoid scratches. For the wood, avoid harsh cleaning products that can damage the finish. Instead, use a slightly damp cloth to wipe the surface and dry it immediately to avoid any build-up of moisture.Polishing the glass
Over time, glass can lose its shine because of fingerprints and stains. To keep it bright, consider polishing it regularly with a specific product or a homemade solution such as a mixture of white vinegar and water.Protecting the wood
Wood is prone to damage caused by UV rays and humidity. To protect your table, apply a protective coat every year or as recommended by the manufacturer of the product used. By looking after your wooden table with a glass insert, you will enjoy an elegant centrepiece in your interior or exterior space for many years, and you will also preserve the integrity of the handwork you put into making it.
In conclusion, building a wooden table with a glass insert is an exciting and rewarding project that combines creativity and technical know-how. Whether you are a seasoned DIYer or taking your first steps into the world of DIY, this project offers the chance to create a distinctive piece of furniture that reflects your style and beautifies your living space.
We have explored the various stages of creation, from choosing the materials to fitting the glass insert and the finishes. Each stage calls for particular attention to guarantee the strength of the structure and the beauty of the final result. The care you take over the upkeep of your table will also help ensure its longevity.
This exploration reminds us how rewarding it is to build your own furniture. Not only does it give you total control over the looks and quality of the final product, it can also be an excellent way to save money while having a piece of furniture perfectly suited to your needs.
But do not stop there! We encourage you to explore the world of DIY and interior and exterior design further. Why not try your luck with our collections? Whether you are looking for coffee tables, dining tables or chairs for indoors or outdoors, Verano Design offers an impressive variety of premium products to meet your every wish.
And remember, the world of design is constantly evolving. Keep an eye out for the latest trends and let yourself be inspired for your next projects. Above all, do share your creations and experiences with us on our social media or in the comments. We look forward to discovering your work!
So, ready to start? Get your tools out, and let the creating begin!






