
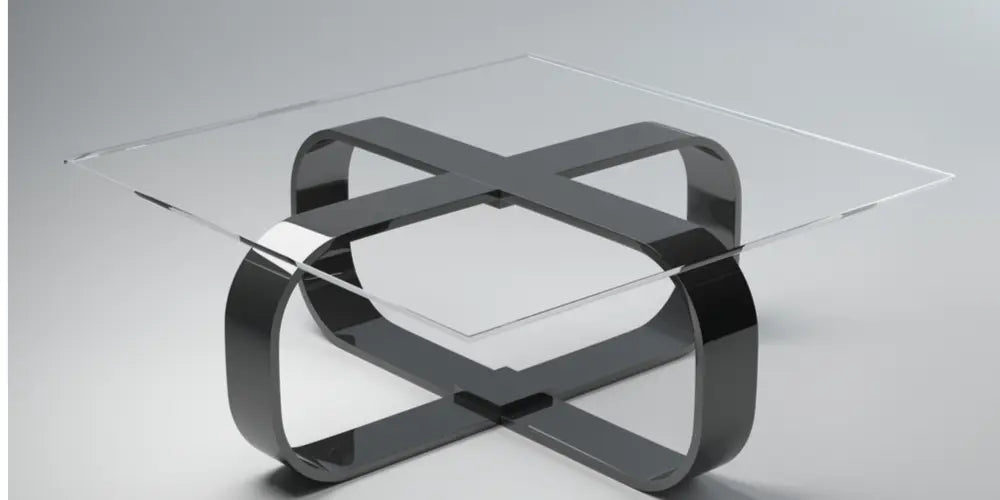
Glass furniture, with its elegant, modern look, has won over many interior design enthusiasts. It brings a touch of sophistication to any living space, whether a cosy lounge or a professional office. Assembling these pieces can nonetheless seem daunting. Attaching the legs to a glass tabletop in particular can look like a tough job.
But don't worry! Even if you are new to DIY, this is entirely achievable with a little patience and the right tools. That is precisely the aim of this article: to guide you through the process step by step so that you can build your own glass table with confidence and pride.
In this article, we will look at how to choose the right materials for your project, prepare the glass tabletop for assembly, install the fixing brackets, attach the legs to the glass tabletop and, finally, look after your new glass furniture so that it stays beautiful for years. Without further ado, let's turn to our first subject: choosing the right materials!
1. Choosing the right materials

Types of legs for a glass table
First, it is vital to choose the right type of legs for your glass table. There are plenty of options: metal legs for an industrial look, wooden legs for a rustic touch, or even acrylic legs for a modern, clean style. It is important to take into account the weight of the glass tabletop and the function of the table when choosing the legs.
Things to consider when choosing the legs
Style aside, other factors need to be considered when choosing your table legs. For example, the height and width of the legs can affect the balance and stability of your table. Also make sure that the materials used are durable and able to support the weight of the glass tabletop.
The tools you need for assembly
When you get ready to assemble your table, it is essential to have the right tools to hand. These include an electric drill, a screwdriver, a ruler or tape measure to mark the position of the fixing holes accurately, and the right screws to fix the legs firmly to the tabletop.
To sum up this first part, choosing the right materials is a crucial step in assembling a glass table. By taking the time to select your materials and tools carefully from the outset, you can ensure not only the look but also the durability and function of your furniture. In our next section, we will discuss how to prepare your glass tabletop properly for assembly. So stay with us and keep discovering the fascinating world of glass furniture making!
Ready to choose the perfect legs for your glass table? Explore our selection at Verano Design and take inspiration from our high-end designs!
2. Preparing the glass tabletop
Before you start assembling your table, it is crucial to address the preparation of the glass tabletop. A good start makes the whole process much easier.How to handle glass correctly
Glass is a delicate material that needs careful handling. Make sure you wear gloves to avoid cuts, and always use two people to move the glass tabletop. Remember that glass can be heavy, so lift with your legs, not your back.Cleaning and preparing the glass tabletop
Thorough cleaning is needed before any other step. Use a soft cloth and a non-abrasive cleaning product to remove fingerprints and other dirt. Then dry the surface carefully to avoid water marks.Marking the positions for the legs
This is where you decide exactly where you want your legs to sit on the glass tabletop. Use a tape measure to find the exact position and mark these points with a dry-erase marker or a white wax pencil. Have you thought about how the position of the legs could affect the overall look of your space? For example, placing the legs closer to the centre can give an impression of open space, while placing them at the ends can offer more stability.3. Installing the fixing brackets
Now that your glass tabletop is ready, it is time to install the fixing brackets. This is a crucial step in ensuring the stability and safety of your table.

Choosing the right fixing brackets
There are different types of brackets, such as screw-on plates, glue-on tabs and suction cups. The choice will depend on the weight of the glass and the design you want to achieve. At Verano Design, we offer a wide range of brackets to suit every style and every requirement.The installation process in detail
Installation varies depending on the type of bracket chosen. For a suction cup fitting, for example, make sure the glass surface is clean and dry before pressing each suction cup firmly onto its mark.Tips and tricks for a successful installation
To ensure a successful installation, always make sure the glass tabletop is well balanced before fixing the legs permanently. A spirit level can be useful for this. Also, don't hesitate to ask for a second pair of hands, as this can make the process much easier! What do you think so far? Do you already have a clear idea of how you want to proceed? The next part will cover in detail how to attach the legs to the glass tabletop.4. Attaching the legs to the glass tabletop
The installation process step by step
The first step is to line up the table legs with the marks you made earlier on the glass tabletop. Make sure each leg is positioned correctly before you start fixing. Then drill pilot holes at the marked points using a drill bit designed specifically for glass. Apply light, steady pressure to avoid damaging the glass.
Once the holes are drilled, insert the screws through the fixing brackets into the holes in the glass tabletop. Make sure each screw is tightened properly to keep the table stable. Avoid overtightening, however, as this could crack the glass.
Dealing with common problems when attaching the legs
When you attach the legs to a glass tabletop, you may run into a few common problems such as chipping or cracking of the glass. To minimise these risks, make sure you use suitable tools and apply moderate pressure when drilling.
If, despite your precautions, you notice a small scratch or chip on your glass tabletop, don't panic. Repair kits designed for glass are available and can help to reduce the appearance of these flaws.
Ensuring the stability and safety of the table
Once the legs are fixed, it is essential to check the stability of your table. Make sure all the legs are firmly anchored and support the weight of the glass tabletop evenly. If necessary, adjust the screws to spread the weight evenly.
Do not forget to inspect your table regularly for any sign of wear or damage that could compromise its stability. Preventive maintenance can help to extend the life of your glass furniture.
5. Care and maintenance of glass furniture
Regular maintenance tips for glass furniture
Regular maintenance is essential to keep your glass table sparkling and beautiful. Clean it regularly with a soft cloth and a glass cleaner to prevent the build-up of dust and dirt that could scratch the surface.
Also avoid using sharp objects on the glass tabletop, as they can cause unwanted scratches. Likewise, always protect the tabletop when you put heavy or hot items on it.
Repairing scratches and chips
Despite your best efforts, your glass table may pick up a few scratches or chips. In that case, a glass repair kit can be useful. These kits generally contain a polishing compound that can help to reduce the appearance of minor scratches.
Tips for extending the life of your glass furniture
To extend the life of your glass furniture, avoid exposing the tabletop to extreme temperatures or direct sunlight, which could discolour the glass over time. Also make sure the legs are always firmly fixed and stable to prevent any structural damage.
Finally, remember that the care and attention you give your glass furniture can make all the difference to its longevity and overall appearance. So take the time to look after your precious pieces properly!
Ultimately, assembling a glass table is a challenge that, when tackled with patience and precision, can bring an undeniable touch of elegance to your living space. By choosing the right materials, preparing the glass tabletop carefully and installing the fixing brackets and legs with care, you can turn a simple glass tabletop into a functional work of art.
But let's not forget that the beauty of a glass table does not stop at its initial appearance. Regular maintenance plays a crucial role in keeping it sparkling and durable. With the right advice on caring for and repairing glass furniture, your centrepiece can look as good as new for years.
And now that you are equipped with this valuable knowledge, why not put these skills to the test? At Verano Design, we offer an exquisite range of glass tabletops ready to be transformed by you. Whether for coffee tables or indoor and outdoor dining tables, we have something for every style and every space.
We look forward to seeing how you bring these luxurious design pieces into your decor. Feel free to share your assembly experiences and final results on our social platforms or in the comments section below. Your next DIY project could well inspire our community of indoor and outdoor design enthusiasts.
As we continue to explore the fascinating world of designer furniture, stay tuned for future trends and innovations. The field of glass furniture, in particular, promises exciting developments in the years to come. At Verano Design, we are committed to bringing you the best of high-end design for your home or outdoor space.
In conclusion, attaching the legs to a glass tabletop is more than a simple assembly process. It is an opportunity to express your creativity, hone your DIY skills and transform your space with a piece of furniture that is as much a work of art as it is functional. So take the plunge and discover the pleasure of creating something truly special.






