
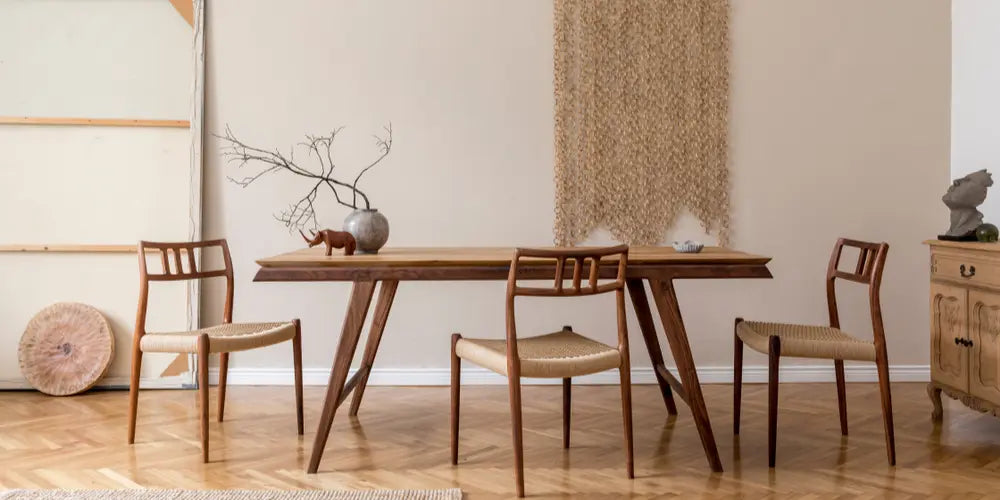
Imagine a table that adapts to your space and your needs, a table that can host a romantic dinner for two or a large family gathering. Such a marvel exists, and it is called an extending table. With its clever design and versatile function, this piece of furniture has become a real star of modern interiors as well as outdoor spaces.
In our constantly changing world, where space is often limited, knowing how to make an extending table can be a valuable asset. It calls for some DIY skills, but do not worry, we are here to guide you through this exciting process. Ready to transform your space with a touch of creativity? Then let us dive into the fascinating world of extending tables!
1. The advantages of an extending table

An ideal solution for small spaces
Have you ever felt the frustration of not having enough room for all your guests? With an extending table, that problem is a thing of the past. Thanks to its ingenious mechanism, it optimises space by adapting to the number of diners. When you do not need it, it keeps a low profile and frees up room.
A variety of styles and materials
The other major advantage of the extending table is its variety. Whatever your decorating style, you will find an extending table that fits in perfectly. Whether you are a fan of Scandinavian style with natural materials such as wood, or you prefer industrial chic with metal elements, there is an extending table for you.
A table for every occasion
Whether for an intimate dinner, a family brunch or an evening with friends, the extending table is your ally. It transforms in the blink of an eye to seat all your guests comfortably. And when it is not in use, it goes back to its original size without cluttering the space.
Beyond these practical advantages, the extending table is also a fine expression of your creativity and your DIY skills. So, are you ready to find out how to make this marvel? Stay with us to explore the choice of materials and tools in the next part!
And if you would like to see more options before embarking on this exciting project, visit our Verano Design shop, where you will find a selection of high-end extending tables.
2. Choosing materials and tools
The first step in making an extending table is to choose the right material. The choice of material will depend on your personal preferences, your budget and the style you want to give your table.Wood: a classic, versatile choice
Wood is the most commonly used material for making extending tables because of its durability, its natural warmth and its ability to suit different decorative styles. There are several types of wood to choose from, such as oak, maple or walnut, each with its own characteristics in terms of colour, grain and strength.
Metal: for a modern touch
If you are looking for a more contemporary style, metal can be an excellent option. It offers exceptional sturdiness and can be worked to achieve different finishes. It also pairs well with other materials such as glass or wood.
Glass: elegance and lightness
For those who prefer a clean, modern design, glass is ideal. It gives a sense of space and light while adding a touch of elegance. However, it needs regular cleaning to avoid marks and scratches.
Once you have chosen your material, it is time to gather the tools you need. You will need a saw to cut the wood or metal, a hammer, screws, wood glue if you are working with wood, and a table extension kit.3. Making steps

Making an extending table may seem intimidating at first, but by following these steps you will be able to create your own unique piece of furniture.
Step 1: Design
Start by drawing a detailed plan of your table. Determine the exact dimensions and the position of the extension leaves. Remember that the table must be stable and sturdy even when extended.
Step 2: Cutting
Once your plan is ready, start cutting the different pieces to the measurements given. Be precise in your cuts to ensure a perfect fit.
Step 3: Assembly
This is where everything takes shape. Assemble the different parts following your plan. Use screws for greater stability and add glue if necessary.
Step 4: Fitting the extension leaves
The final step is to install the extension mechanism. Make sure it works properly and is well aligned with the rest of the table.
Remember that every project is unique and that these steps may vary depending on your design. Take your time, be precise and above all, enjoy the creative process! Part 4: Care tips for your extending table4. Care tips for your extending table
Once you have made your extending table, it is essential to keep it in perfect condition so that it keeps its new look and continues to serve its purpose for a long time. Here are a few tips to help you with this.Regular cleaning
For daily cleaning, use a soft cloth lightly dampened with lukewarm water. Avoid harsh chemicals, which can damage the wood finish or corrode the metal.
Annual care
Annual care may involve light sanding and applying a fresh coat of finish to wooden tables, or polishing metal tables to prevent rust.
Dealing with damage
For scratches or stubborn stains, you may need specific products such as wax filler sticks for wood or abrasive pastes for metal. Always test these products on a small, hidden area before use.
Now that we have covered the practical side of looking after your extending table, let us turn to the more creative side: how to bring this versatile piece into your interior decor. Part 5: Decorating and styling with an extending table5. Decorating and styling with an extending table
An extending table is more than a practical piece of furniture: it can also be a key element of your interior decor. Here are a few ideas for fitting it in harmoniously with different decorative styles.Modern style
For a modern style, opt for materials such as glass or metal and neutral colours. The simplicity of the design will highlight the function of the extending table.
Rustic style
In a rustic setting, an extending table in solid wood with a natural finish will look superb. Add matching chairs to create a cohesive set.
Best placement
The position of your extending table is also crucial to getting the most from it. Make sure it does not obstruct the flow of movement when the leaves are in place, and consider suitable lighting options to make every meal enjoyable.
With these tips, you are now ready to bring your extending table into your living space in an elegant and functional way. So, are you ready to embark on this exciting project?In conclusion, the art of making an extending table is an exciting process that combines ingenuity, precision and creativity. It is an excellent way to make the most of your indoor or outdoor space, welcome more guests at gatherings and bring a personal, unique element to your decor.
Whether you choose wood for its rustic charm, metal for its durability or glass for its modern look, each material brings a different dimension to your table. Mastering the necessary tools and knowing the making steps will allow you to create a truly made-to-measure piece.
But beyond construction, regular and appropriate care of your extending table will ensure its longevity and preserve its appearance. And let us not forget that decoration plays an essential role in showing off your creation.
If this DIY adventure seems too complex, or if you would rather save time while enjoying a high-end design, we invite you to discover our collection of coffee tables, dining tables and chairs at Verano Design. Each piece has been carefully selected for its exceptional quality and innovative design.
We firmly believe that every home deserves furniture that reflects its unique character. Whether through DIY or by buying a ready-made piece, we are delighted to help you realise that vision.
And if you have already tried making an extending table, we would love to hear about your project. Feel free to share your experiences and ideas in the comments or on our social networks. We look forward to seeing how you turned a simple piece of material into a beautiful, functional centrepiece.
We hope this article has inspired and guided you in your quest to create the perfect table. And remember, whichever path you take to get there, the important thing is to be creative, enjoy yourself and be proud of the final result. Happy DIY!






