
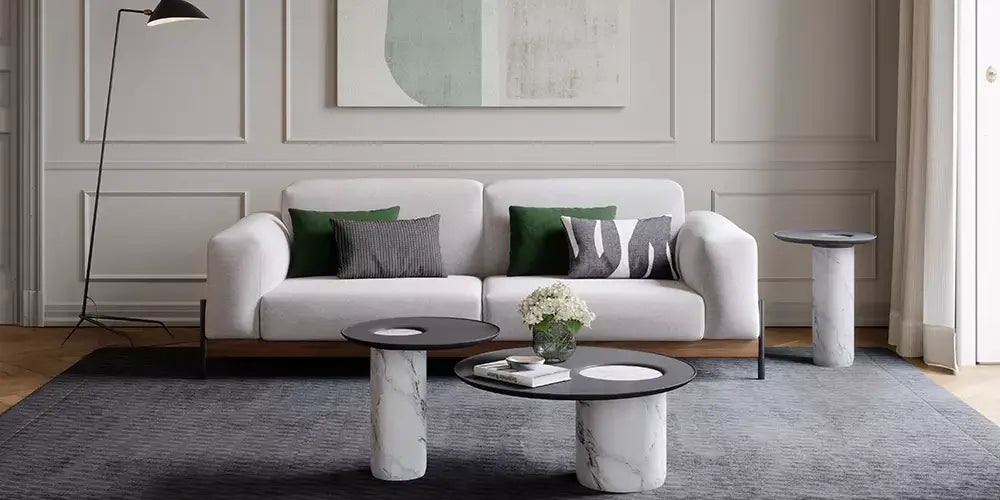
The art of interior and exterior decoration is a true visual symphony, where every element plays its part in creating a harmonious, functional space. At the heart of this symphony, furniture is the instrument that sets the tone. Among the various pieces of furniture that can enhance your space, the nesting table stands out for its versatility and unique design.
A nesting table is a set of tables of different sizes that can be stacked one under another, saving space while offering flexibility of use. Whether to host unexpected guests or simply to add a touch of elegance to your living room, these tables are as practical as they are attractive.
But why buy a nesting table when you can make one yourself? DIY is not only an economical solution; it is also a wonderful way to express your creativity and personalise your indoor or outdoor layout. In this article, we will explore how to make a nesting table from scratch. We will discuss the choice of materials, design and planning, the making process, care and durability techniques, and ideas for personalisation and decoration.
1. Choosing the materials

Wood vs metal: which material to choose?
The choice of material is crucial in making a nesting table. There are generally two options: wood and metal. Wood is a warm, natural and durable material that brings a rustic touch to your interior. It is also easy to work with, which makes it an excellent choice for beginner DIYers.
Metal, for its part, offers a modern, clean-lined aesthetic. It is stronger than wood and can support heavier loads. However, working with metal requires specific tools and a certain level of skill. Your choice between the two materials will therefore depend on your aesthetic preferences, your level of DIY skill and the intended use of the table.
Environmental considerations when choosing materials
When choosing your materials, it is important to consider their environmental impact. Favour wood from sustainably managed forests or recycled metals to minimise your carbon footprint. You can also reuse existing materials: an old wooden door, for example, can be turned into a magnificent square nesting table.
Ultimately, making your own nesting table is not only a matter of saving money or aesthetics; it is also an opportunity to express your ecological values while creating something unique and personal.
Ready to get started? In the next section, we will explore how to design and plan your nesting table. Stay tuned!
Do not miss our upcoming articles on decoration and premium designer furniture. Sign up to our newsletter now!
2. Design and planning
Before you embark on building your nesting table, it is essential to draw up a detailed plan to ensure a successful result.Understanding the dimensions of a nesting table
The first step is to understand the typical dimensions of a nesting table. These tables usually consist of two or three pieces of different sizes that fit into one another to save space. The size varies according to your specific needs and the style you want to create. For example, if you plan to use the largest table as a coffee table in your living room, it should be about as high as the seat cushion of your sofa.How to draw a technical sketch
Once you have decided on the dimensions, it is time to draw a technical sketch. This may seem daunting if you do not have much experience in drawing or design, but do not worry! A simple freehand drawing with clear measurements will be enough. Start by sketching the overall shape of each table on a sheet of squared paper. Then add the measurements for each part: height, width and depth. Do not forget to include the thickness of the material you have chosen. This phase requires some precision and attention to detail, as it will guide the whole building process that follows.3. The making process
Now that you have a plan in hand, it is time to get to work and start making your nesting table.

Cutting the materials
The first step is to cut the materials to the dimensions you set out in your technical sketch. For this you will need a saw suited to the chosen material. Be sure to measure carefully before cutting to avoid any mistakes.Assembling the pieces
Once all your pieces are cut, it is time to assemble your table. Depending on the design and material chosen, this may involve using wood glue or screws. Remember that the structure must be solid to ensure the durability of your nesting table.Finishing
The final stage of the process is applying the finishes. This can include sanding to ensure a smooth surface, applying a protective coat such as paint or varnish, and adding any decorative elements. And that brings our journey through the fascinating process of making a nesting table to an end. By following these steps and putting a little love into every detail, you can create a unique piece that will add character to your indoor or outdoor space. In the next section, we will look at the care needed to extend the life of your new creation! Part 4: Care and durability4. Care and durability
A quality nesting table, made with care and attention, can last for years. However, to ensure its longevity, proper maintenance is essential.Cleaning and caring for your nesting table
Regular cleaning of your nesting table is crucial to keeping it looking attractive. Use a soft cloth to dust the surface of the table. If you have chosen wood as your material, avoid harsh chemicals, which can damage the finish of the wood. A mild mixture of warm water and soap is usually enough to remove stubborn stains.
For metal tables, a non-abrasive sponge with a little mild detergent is ideal. Just make sure you dry the surface completely after cleaning to avoid rust.
How to ensure your table lasts
Regular care is not limited to cleaning. Periodically inspect your nesting table for any signs of wear or potential damage. Screws can loosen over time, so make sure they are tight.
If you notice scratches on the wood surface, you can use a special furniture pencil to disguise them. For metal tables, a little paint can help cover scuffs.
Finally, think about where your table is placed. If it is constantly exposed to the sun, the material may fade over time. Likewise, constant exposure to damp can cause metal to rust or wood to swell.
Part 5: Personalisation and decoration5. Personalisation and decoration
The beauty of making your own nesting table is that you can personalise every aspect to your own preferences.Paint and decorative finishes
Paint is an excellent way to add colour and character to your nesting table. You can choose a shade that matches your existing colour palette or opt for something bold and vibrant to make a statement.
Decorative finishes can also add extra charm. For example, you can add stencils to create intricate patterns or use ageing techniques to give your table a rustic look.
Adding a personal touch to your nesting table
Let your creativity run free when it comes to adding personal touches to your nesting table. Perhaps you would like to incorporate mosaic tiles on the top or add sculpted legs for an elegant look?
Your nesting tables can be much more than just functional: they can be a true expression of your style and personality. So do not hesitate to experiment and have fun throughout the process!
Having explored the different facets of making a nesting table, we are confident that you have gained valuable knowledge for your own project. From the careful selection of materials to detailed planning, through the making process and the care needed to ensure your piece lasts, every stage is crucial to creating a unique, personalised piece of furniture.
The importance of DIY in interior and exterior design cannot be underestimated. Not only does it offer an economical solution, it also lets you express your personality and style. Adding personal touches to your nesting table can turn a simple piece of furniture into a true work of art that enhances the aesthetics of your space.
Now that you have the knowledge you need, we encourage you to take action! Put what you have learned into practice and start creating your own nesting table. If you are looking for more inspiration or want to complete your creations with premium designer pieces, do explore our exclusive collection at Verano Design.
When it comes to designer furniture and decoration, trends are constantly evolving. So stay in touch with us to keep up with the latest news and trends. And do share your creations or ideas on our social networks, as we love to see how our readers put their new skills into practice!
In conclusion, making a nesting table is not just a DIY project, it is a rewarding experience that lets you express your creativity while creating a functional, aesthetically pleasing piece of furniture. So what are you waiting for? Pick up your tools and start creating!






