
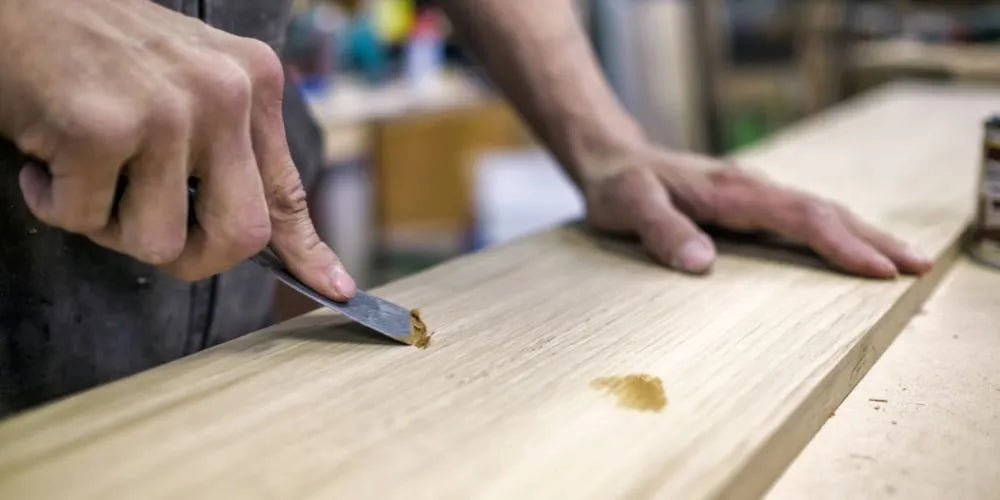
Introduction
Have you ever looked at your wooden table, worn by time and shared meals, and wondered how to give it a second youth? Or perhaps you have found an old piece of furniture at a flea market and dreamed of giving it a new life? Sanding wood is one of the key steps in restoring or maintaining your wooden furniture. It removes imperfections, prepares the surface for paint or varnish and helps extend the life of your precious pieces. But how do you go about it? What tools do you need? And above all, how do you choose the right grit to get the result you want? Join us on a journey into the heart of wood and discover all the secrets of sanding.
1. Understanding how to sand wood

1.1 Why sand a wooden table?
Sanding a wooden table is not just a matter of looks. Above all, it is a maintenance task that keeps the natural beauty of this living material. By removing surface scratches, stubborn stains or old flaking paint, sanding also prepares the surface to take a new finish. Whether you plan to repaint your table or simply apply a protective varnish, good sanding will guarantee optimal adhesion and a flawless result. So, ready to roll up your sleeves?
1.2 What is grit, and how do you choose the right grit for sanding a wooden table?
When we talk about sanding, the term "grit" comes up often. But what exactly does it mean? Grit refers to the size of the abrasive particles on the sandpaper or sander. The higher the grit number, the finer the particles and the gentler they are on the wood. The choice of grit depends on the initial condition of your table and the effect you want. For a very worn table or one covered in old paint, start with a coarse grit (40-60) to quickly remove the major imperfections. Then gradually move on to a medium grit (80-120) and then a fine grit (180-220) to refine the surface and get a smooth, even finish.
Now that you understand the importance of sanding and how to choose the right grit, you are ready to put it into practice. But before we dive into the practical steps of sanding, take a moment to explore our collection of premium designer tables at Verano Design. Who knows? You may find your next restoration project there.
2. How to sand a wooden table by hand without a sander

2.1 The tools you need
To sand a table by hand, you will need sandpaper or abrasive paper in different grits, a sanding block to make the work easier and protect your hands, a dry cloth to wipe away the dust produced by sanding and adequate lighting so you can see the surface you are working on clearly.2.2 The step-by-step process
Start by preparing your workspace, making it as clean as possible so that dust does not damage your table. Then choose the grit of abrasive paper that suits the initial condition of your table. For a very worn or painted table, start with a coarse grit (40-60), then move on to a medium grit (80-120) and finish with a fine grit (150-180) to smooth the surface. Place the abrasive paper on the sanding block and begin sanding, always following the direction of the wood grain to avoid unsightly scratches. Apply even pressure and use regular movements. After each pass, wipe away the dust with a dry cloth and check your work in the light.3. How to sand wood easily without tiring yourself out
Sanding a table can be a tiring job, especially if you do it by hand. However, there are techniques and tools that can make the task easier and less tiring.3.1 Techniques for effective sanding
The secret of effective sanding lies in technique. First, make sure you always sand with the grain of the wood and not against it, to avoid leaving unwanted marks on your table. Using circular movements can also help to remove imperfections more quickly. Remember to take regular breaks to rest your arms and check your work. It is also important to change your sandpaper regularly, because worn paper does not sand effectively and makes you work harder.3.2 Innovative tools for easy sanding
If you find that sanding by hand is too laborious, there are several modern tools that can make the job easier. These include electric sanders, which cover a large surface in a short time, and orbital sanders, which are ideal for a smooth finish. However, these tools can be expensive and need certain precautions when used. If you do not want to invest in a sander, an ergonomic sanding block can be a good alternative. It spreads the pressure more evenly across the surface being sanded and reduces hand fatigue. Now that you know how to make sanding easier and less tiring, we will look at how to treat a varnished wooden table in the next section.4. How to sand a varnished wooden table
4.1 Why and when should you sand a varnished table?
If you have a varnished wooden table that has lost its former lustre or shows scratches, it is time to sand it. Varnish, although it gives your table a smooth, glossy look, can wear down over time and with frequent use. Sanding removes this worn layer of varnish, exposing the bare wood underneath, ready to be treated again. We recommend sanding your varnished table when it starts to show signs of wear such as scuffs or stubborn stains that cannot be cleaned off simply. It is also a good idea to sand your table before repainting it, to ensure the new paint adheres as well as possible.4.2 The steps for sanding a varnished table
Sanding a varnished table takes a few more steps than sanding an untreated one. First, clean the surface with a damp cloth to remove any dirt or dust. Then use medium-grit abrasive paper (80-120) to start removing the varnish, always sanding with the grain to avoid scratches. Once you have removed all the varnish, switch to a finer abrasive paper (180-220) to smooth the surface. Finally, wipe away the dust with a damp cloth, then leave to dry.5. Common mistakes to avoid when sanding a wooden table
5.1 A list of frequent mistakes and how to avoid them
Sanding a wooden table may seem simple, but there are several common mistakes that beginners often make. Sanding against the grain: this can cause deep scratches that are hard to remove. Always make sure you sand with the grain. Using the wrong grit: a grit that is too coarse can scratch your table, while one that is too fine may not be effective enough. Always start with a medium grit and work up to a finer one. Not cleaning the surface between changes of sandpaper: the dust produced by sanding can become embedded in the wood if it is not cleaned off properly, which will make the finish uneven. Sanding too hard: applying too much pressure while sanding can damage the wood. It is better to apply light, steady pressure. By avoiding these common mistakes, you can make sure your table will be perfectly smooth and ready for the next stage of your renovation or interior and exterior decoration project.
In conclusion, sanding a wooden table is not only a necessary task for looking after your furniture. Done properly, it is also a process that can turn an ordinary piece into the centrepiece of a well-kept interior or exterior. Whether you choose to sand by hand to enjoy the direct contact with the material, or opt for modern tools for faster, less tiring work, the end result will always be rewarding.
Every grain of sandpaper matters, and every movement counts. It is in these details that the very essence of high-end design lies. And it is this philosophy that guides every creation at Verano Design. Our collections offer a variety of coffee tables, dining tables and chairs that reflect this love of detail and this passion for wood.
We therefore invite you to explore our exclusive collection of outdoor dining tables or our elegant indoor coffee tables. Each one is designed with the same attention to detail that we encouraged you to bring to sanding your wooden table.
And remember: the beauty of a well-sanded table is not limited to its smooth surface. It also lies in the pride of having done careful work, and in the pleasure it gives you every time you use it or simply let your eyes rest on it. So get started. And do not forget to share your sanding experiences with us on social media using the hashtag.
In the meantime, keep an eye out for new trends and innovations in the world of designer furniture. Who knows? Perhaps the next big thing will be a revolutionary sanding technique or a new tool that makes the process even easier and more rewarding. Whatever happens, at Verano Design we will always be here to help you bring out the best in your wooden furniture.






